On New Years Eve I installed the seats and thwart. Canoe finished. Woot Woot! Technically there's still the brass stem band to install, but putting the seats and thwart in means the canoe is fit for use. Substantial Completion. Beneficial Occupancy. Whatever. All I know is it's ready for a maiden voyage. It still needs a name, but that will come. I need to take it out several times and see how it handles, and I think I'll figure out a name that fits.
I installed the thwart first. Chances are your canoe will be either slightly wider or slightly narrower than the width specified on the canoe plan. Cut the thwart to a width that looks appropriate to you. I made my canoe 1/2 inch wider than the plans specify because I cut my thwart a little longer than the width called out on the plans. Find a balance point, mark out two screw locations on each side, then drill and countersink the holes. Drop in the machine screws, and thread the thwart and nuts on to the screws and tighten everything up.
Installing the seats is pretty straightforward. Mark out where the seats will go, drill the holes through the inwales, then come back and countersink the holes. You can use a seat height jig to make the seats the correct height and level. I took a shortcut here and figured the difference between dowel lengths based on the curve of the gunwale, then cut them to the proper length. The ones closest to the ends are a little longer since the ends of the canoe sweep up a little bit. Out on the water, the seats don't need to be 100% absolutely level since paddling and the movement of water makes it so nothing stays level perfectly. The seats do have to be even though from side to side and front to back, but there is a slight amount of play to work with. Measuring and cutting the dowels appropriately for each side capitalizes on this. Since I mounted the seats the same length from each end, I cut the four endmost dowels the same length, and the four innermost dowels all the same length that was slightly shorter. Measuring on your canoe is best way to determine what the length difference will be. I put my long machine screws through the holes, then marked on the seats where to cut and place the holes in the seat frames. After drilling the holes in the seat frames, I threaded the dowels onto the machine screws followed by the seat frames then threaded on the nuts. Seats installed!
After the seats and thwart are placed, go back with thickened epoxy and plugs and fill the holes with the epoxy, then gently force the plugs into the holes. The epoxy will help hold the machine screws in place if you ever want to replace the seats or refinish the canoe and need to remove them. After the epoxy has hardened, shave the plugs down and coat each of them a couple of times with a thin coat of varnish to seal the top, as well as help it blend in with the remainder of the canoe.
Our random, yet highly entertaining, romp through the highly visited and less explored parts of life. Comments with additional information are also welcomed, as are questions looking for more information. If you like my blog or it was useful to you, please comment!
Showing posts with label canoe building. Show all posts
Tuesday, February 23, 2016
Canoe Building: Making the Seats
After I installed the outwales, but before I varnished the canoe, I started making the seats. I used cherry wood, built so that the seats are 10 inches from front to back and 15 inches wide. The legs of the seat extend even further. I epoxied the joints, then clamped them and let the epoxy cure. Then I sanded away the excess epoxy, and routed all of the edges to make them rounded. I drilled two holes for screws on each side of where the pieces came together, then countersunk them so I could plug them. I used cherry plugs, but was really tempted to use walnut plugs to add a darker accent element to the seats. After installing the screws and plugs, I did a final sanding and was ready to varnish the seats as well as the thwart.
I hung all of the pieces and varnished them all at once. I also had made a hollow dowel to use to hide the bolts to get the seats the correct height, but when it came to installing it, I had made it too large. I should have made the width of the dowel the same width or slightly smaller as that of the inwale. I ultimately ended up finding that dimension and remaking the height adjustment dowels.
After a few coats of varnish, I was set to weave the seats. I deliberated what material I wanted to make the seats out of for quite a while. Cane seats are beautiful. But more then that they are breathable (no boaters itch!), and when they start to sag you can wipe the underside of the cane with a wet rag and the cane will tighten up again. I really really wanted to weave some cane seats. I even went so far as check a book out from the library on cane weaving. Ultimately though, I realized that I have young kids who will be canoeing with me. Since they can be a bit hard on things, the cane seats will have to wait. I went with polypropylene webbing instead.
Polypropylene webbing comes in tons of different colors, is UV resistant, does not stretch, and also does not absorb water. It's a way better option than the more common nylon webbing. I singed the end of the webbing and also used a hot needle to melt/fuse two holes in the end where I would screw it to the seat to begin weaving. I wrapped the seats the long ways, stretched it tight, then fused the ends and screwed it to the frame. Weaving back through the short ways with another piece helped further tighten the weave. Once the seats were woven, I was ready to install the seats and thwart and be finished.
Monday, February 22, 2016
Canoe Building: Varnishing!
One of the most harmful things to a cedar strip canoe is ultraviolet light breaking down and discoloring the epoxy. A good UV blocking varnish will prevent this. It also will add a gloss and bring out the warmth of the wood. Before I varnished my canoe, I did a little bit of internet research into what varnish I should use. Lots of builders like Epiphanes. I didn't have a local supplier and I didn't want to ship some in. A test of different varnishes really jumped out at me. The Minwax Helmsman varnishes were the best on the test, and easy to find at Home Depot, so I bought a couple quarts. I chose the glossy finish.
I have a friend with a cabinet shop and he let me borrow his paint room to varnish the canoe (Thanks Larry!). Before I started, I put on my respirator, then wiped everything down with an epoxy solvent one last time. Doing so removes any epoxy dust, fingerprint residue, or anything else that would interfere with the bond or the finish. I then stirred a can of the varnish, and started varnishing. It really reminded me of when I was epoxying the canoe, but the varnish was a lot thinner than the epoxy. I varnished the inside first, then turned the canoe over and varnished the outside. I let it cure for 4-8 hours, then came back and gently shaved away with a razor blade any drips or runs. When the drips and runs were removed, I put on the next coat. You don't need to make thick coats. Thin coats will give you coverage, and will also reduce the chances of drips and runs and save you time in the end. More cure time, then on with another coat. Then repeat. I put three coats on, and could have put on four, but it would have been more weight and more expense with out much benefit. Three coats is great, and then after I've had the canoe out and used it for a while, I can always add another coat to make it shiny again.
I finished and picked up my canoe on December 21. Strapping the canoe to the top of the car sure felt great! I had permagrin the whole drive home. So close to being done!
Canoe Building: Plugging the Holes
A few days after I installed my outwales, I went back to fill the countersunk holes with plugs. I used cherry, the same wood the outwales were made of. You could use darker or lighter wood for the plugs to add a nice accent to your canoe. I got a cotton swab, rolled it in Titebond 3, then coated the inside of each hole. Then I aligned the grain on the plug with the grain on the outwale and gently tapped the plug into place. Again, the small details can make a huge difference! Be sure to line the grain up. It will look much better than haphazardly putting the plugs in. The plugs should be cut with a plug cutter, ideally on a drill press. The plugs have a very slight taper to them so they fit snugly into the holes, but also stick out above the surface.
After the glue had cured, I chiseled the ends of the plugs off. The chisel will do most of the work, just be sure to work a little at a time so you don't gouge out a piece of the outwale or break off the plug underneath the surface. About 6-10 flicks of the wrist on each of the plugs, and they were smooth and even with the outwale. Then I repeated at the next plug until they were all done. A light sanding with 150 grit sandpaper and the plugs blend right in. The canoe still looks unfinished because it hasn't been varnished yet. Now that the inwales, decks, and outwales are installed, the canoe is ready to varnish.
Canoe Building: Installing the Decks and Outwales
While I was waiting for the inwales to cure, I prepared the outwales and decks. I had 8' cherry boards that I made my inwales and outwales out of, so since my canoe is 16' long, it means that for the outwales I needed to epoxy at least 3 pieces together. The curve of the canoe plus the overlap of the splice was greater than two 8' lengths combined. I decided to put a 4 foot section in between the the two eight foot sections for each outwale. That way the outwales would be longer then the canoe, and the splices on the inwales and outwales would be staggered, instead of being in the same location relative to the length of the canoe. Does it ultimately matter? Probably not. But staggering the joints made sense to me. I cut an angled 7 inch section off of the ends of each piece- but was sure to make sure each angle aligned and married up with the corresponding piece next to it. Again, the cut on each was made such that, when installed, the joint angle is not visible from the top. Then I epoxied and clamped the pieces together.
I also prepared the decks. Angled cuts of quilted cherry, with an accent strip of walnut down the middle. I did the best I could to make the grain lead my eyes to the end of the canoe. Epoxy the pieces, then clamp it securely in a jig made specifically to hold it firmly. Be sure to use packaging tape under the joints so you don't glue the deck to your jig! After the epoxy had set up and cured, I cut a curve on the handle side of each of the decks, then rounded it over with my router. Then I sanded the decks and outwales down to prepare them for installation.
A quick note on installing the trim. I don't think it really matters if you install the inwales, outwales, or decks first- it all comes down to personal preference. BUT, there is an order that makes installation easiest and leads to results that I can't argue with. First install the inwales, then install the decks, finally install the outwales. Doing it in this order allows each of the parts to nest together, and hides screws the best. You can see the screws in the picture above where I've clamped one of the outwales on to the canoe. When I installed the other outwale, all of those screws were hidden underneath it. It's a big bonus to not see any screws when you're done!
So dry fit the decks and make sure they fit at the correct depth. You don't want them to be above or below the inwales. Since the inwales are wider at the top than the bottom, I had to mark the angle,then prepare it to fit neatly together. It doesn't have to be perfect, but any discrepancies are best if on the bottom side. Once you like where you have things positioned, predrill three holes on each side of the deck, going from the outside of the hull, through the inwales, and into the decks. Be sure to do so at an even interval so you don't hit these screws when you install the outwales! Put strips of packaging tape along the bottom of the inwales, then slather each side of the deck with thickened epoxy. Fit it in there, clamp it, and drive your screws in. I think I used #8 screws that were 2 inches long. Once all of the screws are in, you can unclamp things. Reach under the deck and firmly press the packaging tape that's on the inwales to the underside of the deck. This will take any epoxy that has been pressed out, and even it out and make a smooth finish. Wipe down any epoxy that has come out the top. You can now work on installing the outwales- no delay is needed for the epoxy to set up since the decks are screwed on securely.
The outwales are pretty easy to install. They do have a few things to keep in mind, but they're pretty basic. Installation is as important as finished visual appearance, so if you make appearance the priority, the installation will fall in line. I marked the centerpoint of the canoe with the smooth edge of some blue painters tape pressed on top of the inwales. Do this on each side. Then do the same on the top side of both of the outwales. You can then clamp the outwales on one at a time, and using the center point reference, and the locations of the scuppers on the inwales you can determine the spacing for your screws to secure the outwales. I marked mine so that the screws would be centered in the solid block between scuppers. I also marked vertically the midpoint between the top and bottom of the outwale. Once everywhere is marked, remove the outwale and drill your pilot holes. You can leave the screws showing, or countersink them and fit plugs into the countersunk holes. I chose the countersink and plug method so there would be no exposed screws. After I drilled my holes and countersinks, I was ready to install the outwales.
Installing the outwales is pretty straightforward. Mix up a batch of thickened epoxy, spread it on a two foot section of the outwale, then starting at the midpoint and working toward the end, clamp it down with a few clamps, install a screw, then leapfrog the clamps along until you get to the end. You'll need to epoxy a few more sections as you go, but it goes quickly. As you work, make sure the horizonal alignment between the inwale and outwale stays even. Repeat each side until both of the outwales are completely installed. Again, be sure to wipe off any epoxy that has oozed out as the outwales were clamped and screwed.
Once the last screw is in the canoe looks great! It took me about 3 hours to get both decks and both outwales installed. I finished up late, then called it a night. After everything cures you can come back and install the plugs.
Wednesday, February 17, 2016
Canoe Building: Installing the Inwales
Now it's time to install the inwales! I cut mine several months prior to this and they've been collecting dust in the meantime. If you're lucky enough to have one piece inwales, you won't have to splice two or more pieces together. I had to put a scarf joint in at the midpoint of the canoe. The joint goes top to bottom of the inwales, rather then side to side. It's less visible that way. It takes 6-7 inches of overlap to get a solid bond between the pieces. If you want scuppers, they also should be machined into the inwales before they are installed. The scuppers, or cut away pieces of the inwales have 3 purposes. They reduce weight, they add convenient gear tie points, and also allow water to drain out when you turn the canoe over. You do not want scuppers on the outwales, since the outwales will help to turn away water and keep it out of the canoe.
Two quick bits of advice about the inwales. First, make sure the spacing is such that the seats can be attached, with front and back of the seat both aligning with solid parts of the inwales. Second, do yourself a favor and put a coat or two of varnish on the scuppers (and only the scuppers!) right now. They'll never be as accessible as you have them before they are installed.
Once your canoe is ready and the scuppers are ready, it's time to install the inwales. Do it one at a time, and take your time. First, wipe down the top 2 inches of the hull with an epoxy solvent to get rid of the epoxy dust from sanding. Then use lots of clamps and clamp the inwale in, about 1/4 inch below the top of the hull. Get it how you like it, then mix up a batch of thickened epoxy. I unclamped one half of the inwale, then applied the thickened epoxy to the non-scupper part of the inwale, reclamped, then screwed a #4 (I think it was #4. Whatever size it says in Canoecraft!) screw into each spot, from the outside of the hull. I placed each screw in relatively the same place to each scupper, since the outwale will be screwed on and I wanted a nice even spacing and rhythm for those screws. Don't forget to go back once you've placed all of the screws to wipe the squeezed out epoxy from the top and bottom of the inwale!
Do it for all of the spots, along one inwale, then repeat for the next inwale. Once the first inwale is screwed on, you can remove the clamps and use them to install the second inwale. That way you don't need to have lots and lots of clamps. After both sides are installed, your canoe is getting even better looking then it was before. Next up: outwales.
Canoe Building: Preparation for Varnish
At this point the inside and outside of the canoe have both been epoxied. The hull is all smooth and shiny and beautiful. Once you trim off the fiberglass cloth tags you can imagine gliding away in the canoe. Not so fast! Yes, it does look beautiful, but it still needs the structural support that the gunwales, seats, and thwart offer. It also requires protection from another enemy of cedar strip canoes: the sun.
Now it's time to take out your sandpaper again and lightly sand the entire hull, inside and out. Yes, sanding does seem counter-intuitive, but in combination with shaving the drips and runs it will result in an even better final finish.
While you are doing this, wear a respirator! You don't want to be breathing the epoxy dust! When you're done, the canoe will look white and dirty and less amazing then it did when you finished epoxying it. But that's ok. Scuffing up the hull is to make it so the varnish can cling to it better. The varnish (there will be several coats) has UV blockers that will prevent the epoxy from yellowing from the UV rays of the sun. It's easiest to do this important step before the trim is installed since it will be easier to sand and you will do a better job since there aren't the tight corners to sand in.
Friday, February 12, 2016
Canoe Building: Fiberglassing the inside of the hull
After the inside is all planed, sanded, wet sanded, and essentially made smooth (faired), it's time to encase it in fiberglass. But before you start, get an epoxy solvent and wipe down the inside of the hull one last time. This will eliminate any oils or other contaminants that will prevent full adhesion of the epoxy. Be sure to wear a respirator while you do this! The low vapor pressure of the solvent makes it evaporate very quickly and be nasty stuff if it gets into your lungs! Spreading the fiberglass cloth on the inside isn't as easy as it was on the outside. Bits of exterior fiberglass want to snag the cloth as you spread it, and you're trying to fit it in a hole instead of over the outside of a dome. The stiffness of the cloth is your friend as you spread it.
Take your time spreading the cloth, Make sure the fibers going across the canoe are as straight as reasonably possible. The fibers going lengthwise will align themselves. Along the way, a good pair of scissors will help as you cut strips in the cloth hanging over the sides to help the rest of the cloth lay flat. For the ends, I cut straight in from the end and folded and tucked the cloth so it overlapped with the other side, essentially giving two layers of cloth right at the end of the boat, but only overlapping a total of 3-4 inches. Once the cloth is smoothed to your liking, it's time to apply the epoxy.
Fiberglassing the inside is much the same as fiberglassing the outside. Start about 1/4 down from the end, in the middle of the canoe and work toward the ends and sides. I worked to cover the far end first, then came back to the middle and worked to the closer end, as shown in the picture above. Work quickly, but consistently. I found that about 1 to 1 1/2 cups of epoxy with hardener in it was about the right amount for each batch for me. Also, if you're ever tempted to squeegee from the side to the middle- don't! Remember- always work from the center of the canoe to the sides!
Here's a picture of the canoe once the inside has been epoxied. Let the first coat mostly cure, then repeat it another two times. Think of it like a waffle breakfast. The first coat makes the waffle, the second coat fills in the holes in the waffle, and the last coat makes it smooth. Ted Moores in his book advocates only doing two coats of epoxy on the inside so you have a little texture to stand/walk on. He must be super amazing when it comes to epoxying. After two coats for me, the bottom was full, and the sides of the inside were blotchy and irregular in the amount of epoxy there. If you're a newbie like me, it might be easier just to plan on doing three coats and having a smooth finish.
Once the epoxy has cured and hardened, you can go back and trim off all of the excess cloth around the top of the canoe.
Monday, February 8, 2016
Canoe Building: Fairing the inside of the Hull
After the epoxy has cured on the outside of the hull for a few days, it's time to pull the canoe off of the forms. It's a milestone event! You've been working so hard on the canoe and finally you get to see what it looks like upright. I built two sling stands out of scrap wood and carpet scraps to hold the canoe once I removed it from the forms. The instructions are in Canoecraft. One change I would make though is 26" high stands are a little short for working on the inside of the canoe. I'd put the vertical dimension of the stands at 30-32 inches.
So there it is- the first upright view of the canoe. It's an exciting moment and it makes you want to bring it out and put it in the water, but there's more to be done before that happens. At this point you can remove the forms from the strongback and take the strongback down. I gave mine to a friend that is going to build a canoe of his own.
Once the canoe is off of the strongback and turned over, it's time to fair the inside of the hull. Run your hand over the inside. You'll feel lots of ridges and valleys in the cedar, as well as bumps of dried glue. You'll be able to use a plane to smooth some of it out. Then graduate to a random orbital sander, as well as sandpaper wrapped around a water bottle for the tight curves. It will take an hour or two (or three), but it goes pretty fast, and each pass the inside of the hull will be a little smoother.
Don't work in one place for too long- regularly move down the hull so you don't sand all the way through it. Use whatever works for you. A plane works best for the heavy ridges, but 80 grit on a random orbital sander moves at a good clip too. Then graduate to 120 grit. For a final sanding, wipe down the inside of the hull with a wet rag to raise the grain of the cedar, then sand it again with the 120 grit. It will be nice and smooth and ready for the next step of fiberglassing the inside of the hull.
Saturday, December 26, 2015
Canoe Building: Fiberglassing the outside of the Hull
Before you fiberglass the outside of the hull, you should make sure you are done fairing and sanding the hull. It will look pretty sweet. Don't forget also to trim the strips along the shear line!
I pulled on my rubber gloves to keep the oil from my skin away from the fiberglass cloth, then carefully rolled it out over the hull. It looked like a shroud. Maybe that's a little to much of a focus on death. I guess you could say it looked like a bride all attired in white. Since you're working toward preparing the boat for it's maiden voyage, that analogy will work.
I then peeled back the fiberglass at the ends and inserted a prolonged oval of fiberglass cloth as a skid plate of sorts- basically a way to make the ends a little more durable because that's where a lot of the wear occurs in canoes. I positioned it just right then folded the cloth back into place.
Fiberglassing is the step that stressed me out the most about the canoe building process. Its something new, and once you start it's pretty much impossible to reverse. It ended up not being too bad. Just find a time where you can work all the way through without interruption- it will be a several hour process. Mix a batch of epoxy, paint it on, then repeat until the canoe is all epoxied. It's fun because as you wet out the cloth, the cedar appears behind it. The fiberglass disappears as it becomes saturated in the epoxy.
You will end up doing three coats of the epoxy. The first coat bonds the cloth to the wood. The second coat fills in the waffle weave of the cloth, and the third coat gives it a glassy appearance. The steps outlined in "Canoecraft" are easy to follow and will give you the desired results.
Tips:
- use the "grunge can" made of a cardboard frozen juice container to clean your squeegee of excess epoxy.
- Start 1/4 from the end to anchor the cloth in place, work toward the end, then go back and work the rest of the way down the canoe until it is done.
- only squeegee two directions- toward the end and down to the ground. You'll want to squeegee other ways, but trust me- don't do it! If you do it will make a wrinkle or bubble in the cloth that will be bothersome to get out.
Once you're done, you'll really see what your canoe is going to become. It's very fun and immensely satisfying to be done with this step!
Canoe Building: Fairing the Outside of the Hull
Have you wondered about fairing the inside? Don't worry about it yet. You still need to fiberglass the outside. Once the added durability from the fiberglass is in place it will be time to pop it off the forms and turn it over to fair the inside.
Thursday, November 26, 2015
Canoe Building: finishing stripping the hull
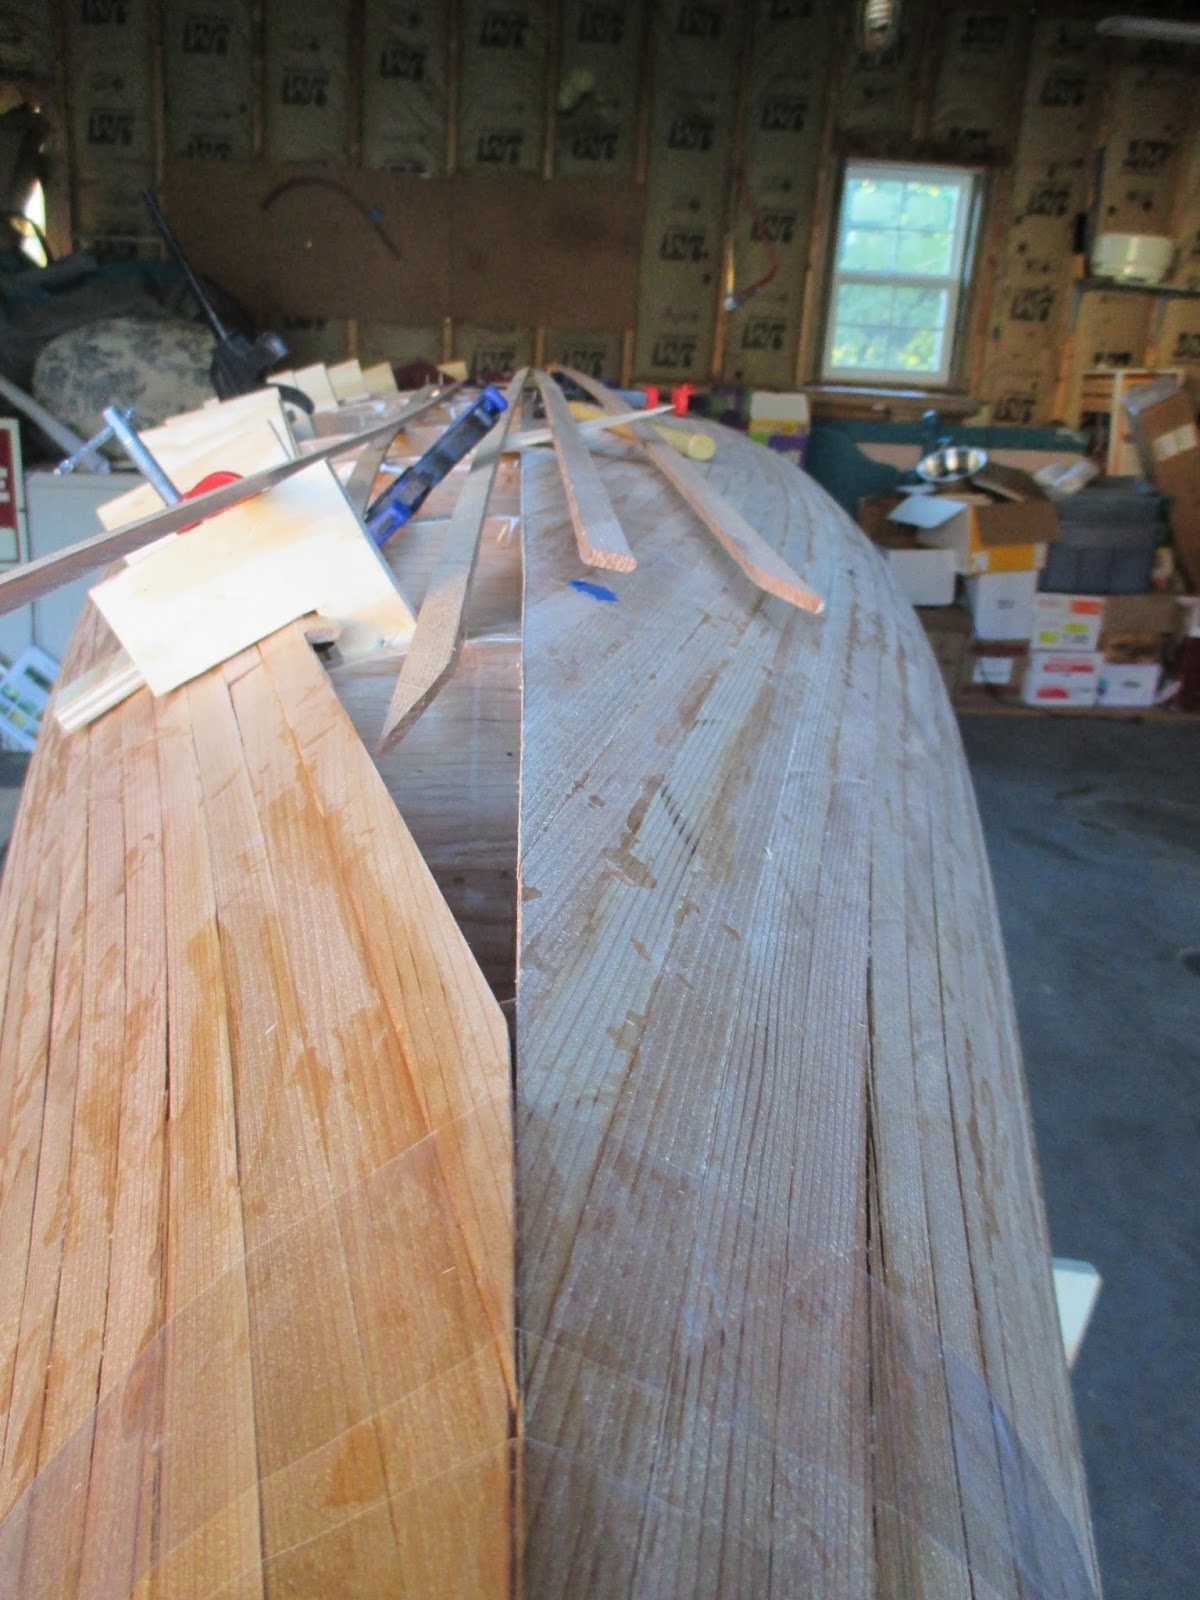
After cutting the center line, it was time to resume stripping the hull. This last quadrant is a bit trickier then the parts already completed, but one of the great things about building a canoe for the first time is that you are able to gain your skills and increase your ability as you go along. So, there are a few challenges at this point, but most likely you've encountered them already and just have to combine a few of the different skills you've already mastered to be able to keep building your canoe.
The main challenges I had were the twisting of the wood and the angled cuts where each new strip fits against its neighbor, as well as into the angled strips from the other side of the canoe. Dry fitting is your friend here! I would get a strip, cut one end and get it angled as I wanted it, then work my way down the canoe to the other end where I would dry fit that end as well. It works for a while, then as I got closer to the center I switched and cut one side and dry fit it, then I'd glue it in place and cut the other end with my chisel. There were a few gaps, but mostly everything went well. The gaps, if minor, aren't that big of a deal since you come back with some wood dust thickened epoxy to fill them once the hull is completely stripped.
So here it is! The completed hull! It's exciting and rewarding to get to this point. It says in Canoecraft that this point is about 1/3 of completion. If you're building stapleless, It's probably about 40% complete.
This is a really exciting point, because you can really see the canoe actually there, complete with the curved and rounded hull! Once you've fitted the last strip, step back, take some pictures and grin and soak it all in. There's still more work to be done, but you've hit a major milestone!
Some tips:
Use the clamping jigs to help push the strips into place.
Use packaging tape to help pull the ends of the strips in to the hull where clamps and jigs won't fit.
Dry fit your angles on each strip before applying glue.
Have a chisel at hand to help trip the strips if needed and you've already applied glue.
Sunday, September 27, 2015
Canoe Building: Cutting the Center Line
When one side of the canoe is completely stripped, it's time to cut the center line. I tried several tools, but the one that handled the best for cutting the line was a chisel. First though, I got a rough idea where the center line was and cut the strip ends off approximately 1 inch generous of the line. It's a rough line, but then the real center line is needed to be marked.
You can mark the center line using a jig and lining the marks up with the centerline of the molds. The second way is to string a line between the stems and pulling it tight. I used both ways, but the string line was most helpful to me. After centering and pulling the line taut, I borrowed some sewing pins from my wife and lightly pinned the centerline reference points, then marked the line between pins. Several visual checks and adjustments got the line straight.
I then used my chisel again and gently cut, starting at the middle of the canoe and working toward the ends, the cedar away and making the center line. Pushing the chisel through the cedar and pulling the shavings away is really fun. Like as in really really fun. If you're not careful, it would be easy to get carried away and cut too far. As I was chiseling, I thought several times about Pat McManus's story about the Christmas Hatchet (In his book "Never Sniff a Gift Fish). His story is a classic. After the line was pretty close, I finished it gently with some sanding paper on a firm block. Sighting down reveals any imperfections. It's exhilarating when the line is straight and one half of the canoe is completely stripped.
Canoe Building: Filling in Strips at the ends
My near fiasco with the lifting strips diverted my attention from my main work focus area as I pondered the options, looked for a solution, and mentally worked through what I wanted to do. I still wanted to keep progress moving along, so I changed my area of focus to work on filling the strips further down. The first strip sets a baseline for adding the strips as you work your way up the sides and toward closure on the bottom of the canoe. There is also the need to add some strips below the sheer line, to contribute toward the pleasing curves and slight uplift near the ends. I removed some cleats and added a few shorter partial strips at a time, finally finishing the stripping that needed to be done on that side of the shear line. It's easy to do, since there's really not any twists or bends in the strips.
One small tip for this area: Add the glue to the strip itself instead of putting it on the stem. Wipe off any drips or excess glue, and lightly clamp it.
Canoe Building: Trouble with strips lifting from the form
Right about now I've got a problem. As I worked my way stripping up the side of the canoe, I started to get the strips lifting off of the molds near the stems. It seemed like a major problem, and since everything has been glued together, it wasn't like I could just undo everything and it would be ok. There are two ways to fix the problem: push from the outside, or pull from the inside. Pushing from the outside is the easy way to fix things, but that creates the problem of making it fiberglass and epoxying the outside a physical impossibility. I must consult the internet!
I looked around and didn't find much in the way of solutions until I found one on the woodenboat forum:
"There are several more noteworthy points to complete these directions, the first and most important being that you need to watch out for where the previously laid strips begin to pull away from the stations in spots, due to the fact that there is no line of staples holding each strip down. When this begins to happen, you must take alternate steps to hold the developing hull against the stations. My method is to take a piece of scrap wood, say 1 x 2 x 4" long, and shape one end on a belt sander so that it will fit the inside contour of the hull at the point at which you'd like to push the hull in. This point needs to be right at a station - you can select a spot by pushing the hull in against the stations with your hands and checking if the hull lays nicely against the forms. Glue the end of the block against the inside of the hull at that location, holding it in place with a clamp passed through one of the clamping holes in the station. At this point, while gluing, the hull is not against the station, but may be even further out while the block is pushing firmly against it. Once the glue is dry, loosen the clamp on the block of wood, push the hull in tightly to the form, and retighten the clamp to hold it. You can then drive a screw through the block to free up the clamp. (I predrill and countersink the blocks for screws to make it easier.) In total, I wind up using 1 to 2 dozen such blocks to hold the hull in place. After the hull is off the mold, I give each block a tap with a hammer to break it out, and all traces of the glue are removed as you're sanding the inside of the hull."
So I thought I'd give it a shot. I glued a few handles to the strips, let them dry, then pushed from the outside as I screwed them to the mold on the inside. After a few of the handles were on, I was getting some good results in one area, but it was transferring the lift elsewhere. I realized that if I want to finish this anytime soon, I'd be in trouble. Lesson learned: if you're getting lifting, affix the "handles" to the inside as you go along on an as-needed basis.
A friend suggested emailing where I got the plans from and asking if the lifting was really a problem, Great idea! I emailed Northwest Canoe and got this response:
"We typically build with fasteners for that very reason.. strips can lift away from the forms. The ‘cheek’ in the NWC River dramatically shortens the waterline length when you heel the canoe. Presenting a rounder shorter mid-section allows for snappier turns in moving water and is preferred by many freestyle paddlers too. The slight re-design you-re making on the fly may handle a bit differently, but should still make a fine paddling canoe. Have fun with your canoe building project. Please keep us in mind for fiberglass, epoxy and your other material needs."
So after spending lots of time thinking up a solution, I decided that the best solution in my situation is to do nothing. The canoe may handle a little differently then designed, but should still be a good canoe.
The changes resulting from me doing nothing are pretty straightforward:
The rocker (difference in height along the keel line) is cut in half from 2 inches to about 1 inch. This should make the boat slightly more stable, but less nimble.
The cheeks will be fuller and not as narrow as in the original design. Again, this makes it a little less nimble. Basically, the changes make the canoe a little more of a lake and flatwater canoe. Since I don't canoe much in rapid water, I'm ok with the changes.
I'm glad I've alternated strips as I've worked on the canoe, since the forces on each strip will be approximately the same since each came from adjacent places in each board.
Saturday, September 26, 2015
Canoe Building: Stripping around the bilge and bottom
September 12 was another milestone day on my canoe. I finished one side of the boat. Once you strip past the stems, you have two options. You can strip one side at a time, like I did, or you can make a herringbone type pattern and alternate end overlap as you strip the "football". Actually, you have a third option if you wanted to just put the strips in straight from end to end, but I don't think that option looks nearly as good as the other two. I was uncertain about the cuts needed to interlock the strips, so I settled on the first option. As I worked my way up, I made sure the end of each strip went past the centerline of the canoe so that I can go back and cut the centerline in with a chisel. Too long is good. Too short is bad. Just do the right thing here and make each strip a little long.
One thing I mentioned earlier, but need to mention again is be deliberate in the strips you use and where you use them. If you kept the strips in order when you cut them, then again when you routed the bead and cove, you can bookmatch them on the canoe. It's easier to alternate the strips as you work up the sides then it is once you are to the point you are only working on one side. A solution that worked for me is selecting a strip for the canoe, then writing a number (for example 1) on the next strip as well as a piece of paper. Then I'd set the numbered strip (1) aside before pulling another strip for the canoe. I'd then write the next number (2) on the end of the next strip of the board and set it aside. In the example, I would have pulled 4 total strips out of the board at this point. I'd work my way up the canoe and through the board, alternating sides the whole way. An easier way of saying it is all of the even strips in the board would go on the left side of the canoe and all of the odd numbers would go on the right side of the canoe. That way the colors, tones, and textures would be matched on the "football" or bottom side of the canoe.
The most difficult time stripping is right around the bilge of the canoe. Strips will be twisted, flexed, and bent all at the same time. Slow down and only do a strip or two for for a few times and it will be easier to manage them all.
Canoe Building: Stripping the Sides
By September 4th, my canoe was well on the way. After adding a few strips to each side, I added a strip of lighter colored cedar as an accent strip. It takes a few days of stripping, but after doing a strip or two every evening, I was ready to add three strips at a time. It does make for an hour of craziness, but the progress sure goes quickly! Stripping the sides of the canoe is fun and very rewarding, You can see the canoe progress quickly and the shape really come into its own. You also aren't to the bend of the bilge yet where you get some crazy forces twisting the strips in three different directions at the same time. Enjoy it- the progress goes quickly and is relatively headache free. No need to pull out what Ted Moores calls the moaning chair just yet. That will come soon enough!
I do have three tips for this stage of the canoe. 1: Get a couple of packets of cheap shims from the hardware store. They'll help keep the strips snug against the molds.
2: Make some wedges out of the bead side of a reject strip. They will be used to force the strips together as well as keep the cove from getting mashed down by the cleats.
3. After you've added 8-10 strips, prepare four wedge strips (about 2-3 feet long each) and work them in. Have the big end of the wedge at the stem side, with the point toward the center of the canoe. You can run the wedges through your router beforehand so they have the bead and cove edges to interlock with the other strips. Canoecraft doesn't discuss this much at all, but if you look carefully at some of the photos, you can tell that there are wedge strips in there. Placing them now will eliminate some of the twist and strain that the strips encounter when you get to the bilge. How do I know this? I didn't do wedges strips and it made it harder. When I finally did them, it reduced a ton of strain, but it would have been easier and made a better looking canoe if I would have added them earlier.
Canoe Building: Placing the first strip
Late August (August 22 to be exact) rolled around and I was ready to put on the first strip. This is important for two reasons: 1, I'm actually starting on the canoe itself. and 2. The first strip is the one that every other strip is based off of, so it's important to make it level.
Really it's not hard. I drilled a small hole in the strip where the center form (#8 for me) is, then placed a small nail in the hole and hammered it into the form. I've learned the lesson of pre-drilling on the canoe. Pre-drill everything! When in doubt, pre-drill it! Then I worked my way down the strip toward the stems, attaching another nail or two on each strip on the #6 and #10 molds. Toward the stem the strip droops slightly from the pull of gravity, but that's ok. I clamped it at the stems, then going back to the center, affixed the cleats at each mold. I found pretty quickly that positioning the cleat, then clamping it in place, allowed me to put two screws through the cleat and attach it firmly to the mold. I then would remove the clamp and go to the next mold and repeat.
Here's an up-close view of the cleat with the strip in place. After I got one side done, I repeated the process on the other side, the only difference is that on the second side I used a level to make sure the two sides were parallel with each other. I finished by gluing the strips to the stems and clamping them in place to dry. A little sand paper attached to the pads on the clamp help give it a little grip since the gripping surface at the stems is angled.
So that was it- the first strips of many! My canoe building is finally happening!
Canoe Building: Making the Thwart
About halfway through cutting and machining the strips one of the router bits went bad. I had put the router bit in, tightened everything down, then turned on the router. It didn't sound right and had a wobble, so I turned it off, and checked things over again before turning it back on. This time the shaft on the bit bent and the top of the bit started taking out chunks of anything it came in contact with. I shut it down as quickly as I could and knew that routing was over until I could get a new bit. It is crazy to think of the forces that the router puts out to bend the shaft on the bit! I called up MCLS Woodworking where I had ordered the bit from and they said they'd replace it free of charge. Talk about awesome customer service! I got it in about a week from when I contacted them.
While I waited for the bit, I wanted to keep moving forward with the canoe. My solution was working on the thwart. I cut a piece of cherry that is a couple inches wider then the canoe will be, and about 2 1/2 inches wide. I got out some graph paper and drew out a couple of curves that seemed like they would work. I picked an intersection on the paper, with the x axis representing the width of the canoe and the y axis being the width of the thwart. Counting squares horizontally and vertically helped to get the basic concept down, then getting a thin strip of wood (I happened to have an abundance of them with all of the cedar boards I had just cut up) to connect the dots in a way that curved attractively. I then cut out the template, then transferred it to the cherry.
After I cut the cherry out, I sanded down the curves, then ran it through the router with a round-over bit to make the edges all nice. A little more sanding on the flatter sides, with finer and finer sandpaper, and the thwart is now ready to varnish.
I've got the thwart put away until the rest of the canoe is finished. I think I'll varnish it the same time I varnish the seats and rest of the trim.
Friday, September 25, 2015
Canoe Building: Ripping and Routing the Strips
In early August I started ripping strips. Red cedar, a table saw, and lots of time. Be sure to wear a dust mask since it's really dusty when you cut the strips, and because cedar dust causes cancer.
I set the fence on the table saw to do 1/4 inch strips, then did my best to make an infeed and outfeed table to help support the boards on the infeed and strips on the outfeed. Good infeed and outfeed tables make your job a whole lot easier. You might even consider talking to a cabinet shop owner and with his assistance and shop ripping the strips there. As the strips come off, keep them lined up in the order they were cut from the board. Keeping them in order will help you match the sides of the canoe and make your finished boat look better then if the strips were completely randomized.
After the strips were all cut, I set up a few guides on my routing table and started routing out the bead on each strip. It is possible to make a two router setup and cut the bead and cove in one pass. I ultimately decided to make the multiple passes. Again, keep your strips in the order they were in the board!
I routed the bead on all of my strips at once. The little fins on the cove can be delicate, so I minimized that risk when I did them by only routing the cove side of the strips one board at a time, on an "as needed" basis. So even after I started putting the strips on the canoe, I stopped a few times along the way to rout out the coves on more strips as I needed them. Here's a picture of a smaller board that I made strips out of. Notice the grain on the strip ends and how it all lines up together because I kept the strips in order.
Subscribe to:
Posts (Atom)